TCPdump is a powerful command-line tool for analyzing network traffic in real-time, making it indispensable for network administrators and security professionals alike. From identifying network bottlenecks and troubleshooting service issues to detecting security threats, TCPdump’s versatility lies in its ability to filter and capture specific packets based on various criteria. Whether you’re on Linux, macOS, or Windows, learning to install and use it effectively opens the door to deep insights into network operations.
Table of Contents
What is TCPdump?
TCPdump is a powerful command-line packet analyzer that captures and logs network traffic in real time, making it an essential tool for understanding network behavior. It intercepts packets passing through the network interface, allowing users to examine individual data packets and analyze communication between devices. This visibility is crucial for troubleshooting network issues, conducting security audits, and gaining insights into network performance.
While TCPdump was initially designed for Unix-based systems like Linux and macOS, a Windows-compatible version, WinDump, is also available. TCPdump allows users to filter packets based on host, protocol, port, and other criteria, enabling focused troubleshooting and detailed analysis. For network administrators, security analysts, and IT professionals, it is an invaluable tool for diagnosing, monitoring, and understanding network activity.
Suggested: How TCP monitoring works?
Understanding the Role of TCP in TCPdump
The “TCP” in TCPdump refers to the Transmission Control Protocol (TCP), one of the core protocols of the Internet Protocol suite. TCP provides reliable, connection-oriented communication between devices, ensuring that data packets are delivered in the correct order and without errors. This is achieved through a handshake process that establishes a connection between sender and receiver, sequencing packets to maintain data integrity, and retransmitting any missing packets.
Although TCPdump was designed with TCP traffic in mind, it’s versatile enough to capture and analyze other protocols, such as UDP (User Datagram Protocol) and ICMP (Internet Control Message Protocol). The tool’s emphasis on TCP, however, allows users to monitor and diagnose issues in TCP-based communications effectively, such as failed connections or high latency, which are critical for network stability and performance.
Why Use TCPdump?
Using this network packet analyzer you effectively can:
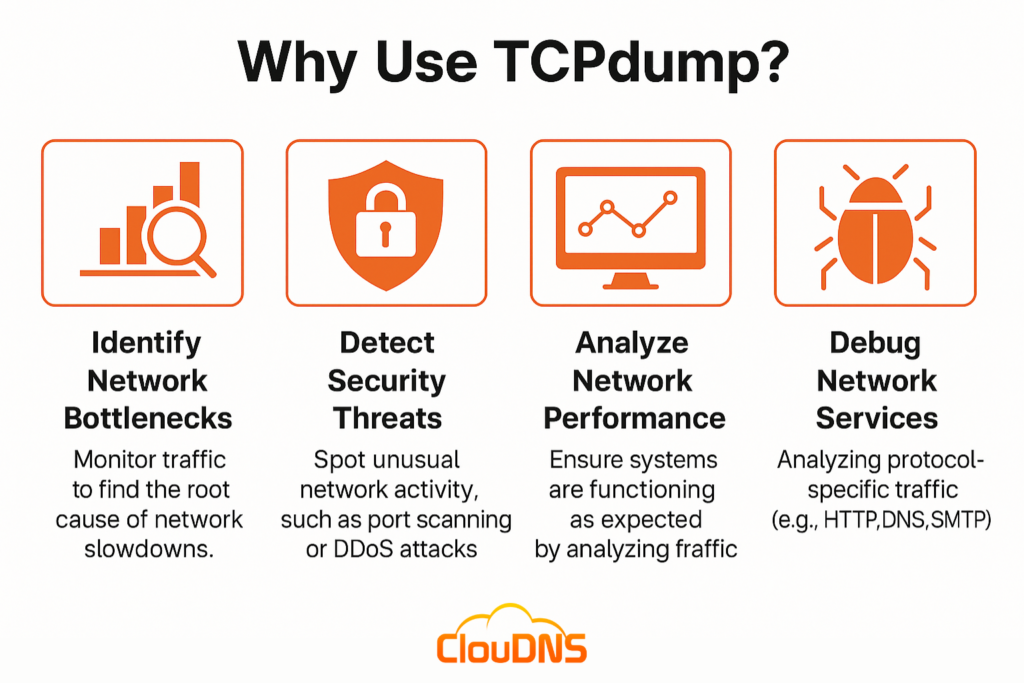
- Identify Network Bottlenecks: Monitor traffic to find the root cause of network slowdowns.
- Detect Security Threats: Spot unusual network activity, such as port scanning or DDoS attacks.
- Analyze Network Performance: Ensure systems are functioning as expected by analyzing traffic.
- Debug Network Services: Analyzing protocol-specific traffic (e.g., HTTP, DNS, SMTP) to diagnose issues in services like websites, email, or domain name servers.
For anyone responsible for maintaining a network, it is a must-have tool. But first, you’ll need to understand the basics of installing and using it.

Installing TCPdump
TCPdump is available on most Unix-like systems, including Linux and macOS, and a similar version called WinDump is available for Windows. Here’s how to install it:
Linux: Most distributions have TCPdump pre-installed. If not, you can install it via a package manager.
sudo apt-get install tcpdump # Debian/Ubuntu
sudo yum install tcpdump # Red Hat/CentOS
macOS: macOS also comes with TCPdump pre-installed. For an updated version, use Homebrew.
brew install tcpdump
Windows: To use TCPdump on Windows, you’ll need WinDump, which works similarly to it. You’ll also need to install WinPcap or Npcap, which provides packet capture capabilities.
Basic TCPdump Syntax and Key Options
To start using TCPdump, understanding its basic syntax is crucial. The structure of a this network packet analyzer command is as follows:
tcpdump [options] [filter expression]
Commonly Used Options
- -i <interface>: Specifies the network interface to capture packets from, e.g., eth0 or wlan0. If you don’t specify an interface, TCPdump defaults to the first available one.
- -n: Disables DNS resolution, displaying IP addresses instead of hostnames. This option is essential for reducing output latency.
- -c <count>: Sets the maximum number of packets to capture. For example, -c 100 stops after capturing 100 packets.
- -w <filename>: Writes captured packets to a file in .pcap format, which is compatible with tools like Wireshark for further analysis.
- -r <filename>: Reads and analyzes packets from a previously saved .pcap file.
Example Command
To capture 100 packets on the eth0 interface without DNS resolution:
sudo tcpdump -i eth0 -n -c 100
This command captures 100 packets from the eth0 network interface, displaying IP addresses instead of resolving them to hostnames.
Understanding It Output
When you run this network packet analyzer command, the output can look complex. Let’s break down the information displayed for each packet captured.
- Timestamp: Shows the exact time the packet was captured, useful for identifying the order and timing of events.
- Source and Destination IP Addresses: Indicates the sender and receiver of the packet. You can immediately see which devices are communicating.
- Protocol: The protocol used by the packet (e.g., TCP, UDP, ICMP). This provides context about the type of traffic and can help you filter for specific protocols.
- Flags: TCP flags, such as SYN, ACK, FIN, and RST, provide insight into the state of a TCP connection. For example:
- SYN: Initiates a connection.
Suggested: What SYN flood attack is?
- SYN: Initiates a connection.
- ACK: Acknowledges received data.
- FIN: Terminates a connection.
- Port Numbers: Displays the source and destination ports, revealing which services are involved (e.g., HTTP uses port 80, DNS uses port 53).
- Payload Data: TCPdump displays the packet data in hexadecimal and ASCII formats, allowing for detailed inspection, especially for protocol troubleshooting.
Understanding each part of this output allows you to gain insights into the traffic captured, helping you identify both normal and anomalous behavior.
TCPdump Filtering
To make sense of large volumes of data, filtering is essential. TCPdump offers extensive filtering options.
Filtering is one of TCPdump’s most powerful features, allowing users to capture only relevant traffic, which is essential for effective analysis. Here’s how to apply basic and advanced filters in TCPdump.
Basic Filtering
- Host Filtering: Capture packets to or from a specific IP.
tcpdump host 192.168.1.1 - Network Filtering: Capture traffic for a specific subnet using CIDR notation.
tcpdump net 192.168.1.0/24 - Port Filtering: Capture packets using a specific port, such as 80 for HTTP.
tcpdump port 80
Advanced Filtering
This network packet analyzer tool supports complex filtering expressions using the Berkeley Packet Filter (BPF) syntax, allowing you to combine multiple conditions for more specific captures.
- Filter Specific Protocols and IPs: Capture only TCP traffic from a specific IP address.
tcpdump tcp and host 192.168.1.1 - Multiple Port Filtering: Capture packets on multiple ports, like HTTP (80) and HTTPS (443).
tcpdump ‘tcp and (port 80 or port 443)’ - Excluding Traffic: Capture all packets except those from a particular IP.
tcpdump not host 10.0.0.5
These filters enable users to fine-tune what traffic they capture, reducing noise and focusing on specific types of traffic.
Advanced Usage of TCPdump
For more granular analysis, TCPdump offers advanced options.
Capturing HTTP Traffic
To capture HTTP traffic on port 80:
sudo tcpdump -i eth0 tcp port 80 -A
The -A option displays packet contents in ASCII, making it easier to read text-based protocols like HTTP.
Capturing DNS Traffic
DNS queries use UDP port 53. To capture only DNS packets:
sudo tcpdump -i eth0 udp port 53
Learn how to use UDP Monitoring!
Follow TCP Streams
TCP streams are useful for tracking the progress of TCP sessions. The following example captures a complete TCP session between a client and server:
sudo tcpdump -i eth0 -w tcp-session.pcap ‘tcp’
Using Wireshark, you can open the saved .pcap file and follow TCP streams more conveniently.
Saving Captured Packets
You can write packets to a .pcap file for later analysis with tools like Wireshark:
sudo tcpdump -i eth0 -w capture.pcap
To analyze saved data, use the -r option to read from a .pcap file:
tcpdump -r capture.pcap
What TCPdump Can (and Can’t) Protect You From
TCPdump plays an important role in security and troubleshooting, but it’s crucial to understand its strengths and limitations. You can think of TCPdump as a visibility tool—it shows what’s happening, but it doesn’t intervene.
TCPdump can help with:
- Detecting unusual or suspicious traffic
- Spotting scanning attempts or repeated failed connections
- Identifying communication with questionable IPs
- Analyzing compromised host behavior
- Examining packets for forensic or debugging purposes
TCPdump cannot do:
- Block or stop attacks
- Decrypt encrypted traffic (HTTPS, VPNs, SSH, etc.)
- Replace IDS/IPS or firewall systems
- Analyze traffic that never reaches the monitored interface
TCPdump gives you insight, not protection. It’s your eyes, not your shield – and used properly, those eyes are extremely valuable.
Use Cases
Network Troubleshooting – If a specific service is running slow, use it to capture packets and analyze potential issues:
- Identify Slow Connections: Capture packets to identify connections that are timing out or taking too long.
- Track Failed Handshakes: Look for SYN packets without a corresponding ACK response, indicating failed connections.
Security Monitoring – This network debugging tool is also valuable in security contexts. It can detect:
- Unusual Traffic Patterns: Monitor for unusual traffic to detect port scanning or DDoS attacks.
- Malicious Connections: Identify connections to suspicious IPs by capturing outgoing packets and matching IPs against a blacklist.
Conclusion
With its powerful packet capture and filtering capabilities, TCPdump serves as an essential tool for anyone looking to monitor, diagnose, or secure a network. From troubleshooting slow connections to identifying security threats, TCPdump provides a clear window into network traffic, helping you stay ahead of potential issues. Understanding its core functions empowers you to take full control of network analysis and troubleshooting.


