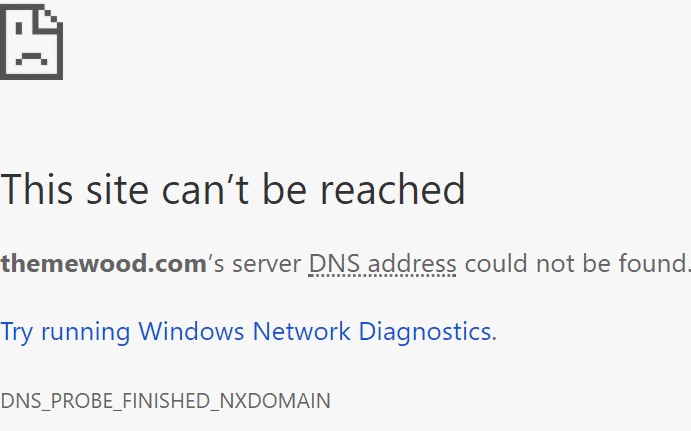
Imagine the situation, you are browsing the internet, minding your own business and suddenly you see DNS_PROBE_FINISHED_NXDOMAIN in your Chrome browser! You didn’t enter the page you wanted, you hit refresh and still nothing! Now, what to do?
What is DNS_PROBE_FINISHED_NXDOMAIN?
It is a DNS-related error that shows that the domain that you are trying to reach does not exist (NXDOMAIN means non-existing domain). The DNS can’t find the corresponding IP address to the domain you just entered.
Most of the times this is a DNS configuration problem, and the problem is in your device, not in the domain itself.
Ok, we said Chrome, but does this happen when you are using other browsers?
We mention Google Chrome, where you get “This site can’t be reached,” but you can get a similar message in any other browser. Mozilla’s Firefox will show you “Hmm. We’re having trouble finding that site”, Microsoft Edge “Hmmm… can’t reach this page”, and almost identical messages on the rest of the browsers.
Experience Industry-Leading DNS Speed with ClouDNS!
Ready for ultra-fast DNS service? Click to register and see the difference!
Ok, so what to do when we see the DNS_PROBE_FINISHED_NXDOMAIN?
There are several ways that you can fix your problem. Let’s explore the possibilities:
1. Flush the DNS cache
If it is bad-configured DNS, the easiest is to start from zero. Flush the current DNS cache and renew the IP address.
For Windows users, follow these steps:
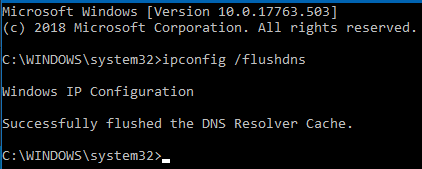
Open the Command Prompt as an administrator. Click the start menu icon and write “Command Prompt,” then run as administrator. Then type “ipconfig /release” and press Enter on your keyboard. Now you can see your current IP address. After that, write “ipconfig /flushdns” and press Enter. You flushed the cache, “Successfully flushed the DNS Resolver Cache.” Next thing to type in “ipconfig /renew”. And now your IP address has been renewed.
For Mac OS users:
Go to “System Preferences…”, then “Network” and later “Advanced.” When you are there, go to TCP/IP and click the “Renew DHCP.”
You can also delete the DNS cache. First, open the “Utilities” and then the “Terminal.” The command you need to write is “dscacheutil –flushcache” and press Enter. It is ready. There is no confirmation message here.

For Linux (Linux Mint, Ubuntu):
If you are using Linux Mint or Ubuntu, by default, the DNS cache is disabled. You can check if it is enabled with the following command “ps ax | grep dnsmasq”. In the message that you’ll get check if “cache-size=0”, then it is disabled. If it is enabled, write the following command “udo /etc/init.d/dns-clean restart”. Then type “sudo /etc/init.d/networking force-reload”. Done!

2. Reinitiate the DNS Client Server.
For Windows users, we will use the “Run” to open “services.msc.” Now you will see all the services that run on your computer. Go to DNS Client, stop it and start it again.

3. Change the DNS servers
Your internet provider automatically set your IP address, using their DNS servers. But you have the chance to change to another DNS server like Google’s public DNS.
Windows:
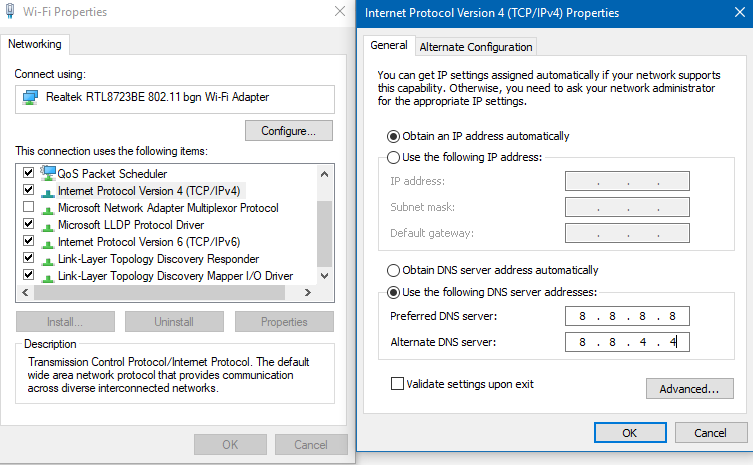
Go first to “Control Panel,” then “Network and Internet” and later “Network and Sharing Center.” There click the “Change adapter settings” and select the network that you are using. Go to properties, search for the “Internet Protocol Version 4” and click on the properties. Set the following DNS servers 8.8.8.8 and 8.8.4.4
Mac OS:
“System Preferences,” Network,” and then “Advanced.” Click on DNS and add the same 8.8.8.8 and 8.8.4.4.

Linux (Linux Mint, Ubuntu):
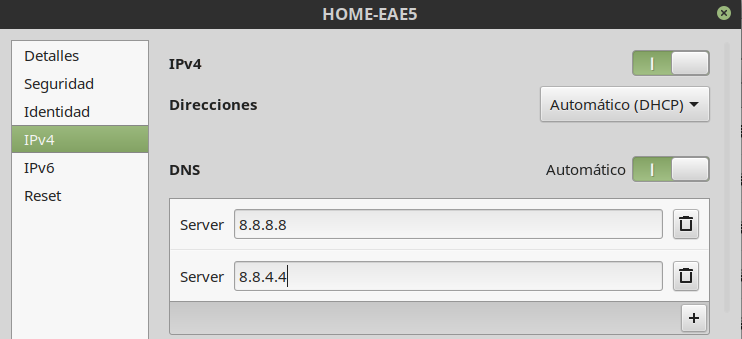
Open “System Settings,” “Network.” Then select the network that you are using and choose “Settings.” Go to the “IPv4 Settings,” and there you will see “Additional DNS servers.” add “8.8.8.8, 8.8.4.4”.
4. Chrome Flags Reset.
Maybe the problem comes from your Chrome browser. Go to your Chrome browser and type “chrome://settings/clearBrowserData” in the address bar. Delete the “Cached images and files,” “Cookie and other site and plugin data” and “Browsing history” from “the beginning of time.”
After that type “chrome://flags/” and a menu will open. Click on the “Reset all to default.” Now restart the browser, and you are ready.

Conclusion
Next time when you see the DNS_PROBE_FINISHED_NXDOMAIN don’t panic. There are easy solutions to this problem. Just try one of those, and you will be ready is a few minutes.
If the site that shows the error is yours, and after trying nothing is happening, go and check if the domain is correctly redirected. If no, do fix it.
Don’t stop following our blog, which is full of exciting and useful articles!



Hi. Thank you.
Fix: The screenshoot you used for the Linux fix has some errors.
sir,DNS_PROBE_FINISHED_NXDOMAIN it is problem our site
Thanks & regards
Dibakar manna